


To start LispWorks on Mac OS X, use the Finder to locate the LispWorks ringed "LW" icon and double click on this. You can add the "LW" icon to the dock if you did not add it when installing LispWorks.
After a short pause, you should see a splash screen, followed by the LispWorks menu bar and the LispWorks toolbar. The LispWorks menu bar and toolbar is shown in The LispWorks menu bar and toolbar. A Listener window will also appear if your image is configured to start one. Note that in this case the Listener menus will be added to the menu bar.
Figure 2.1 The LispWorks menu bar and toolbar

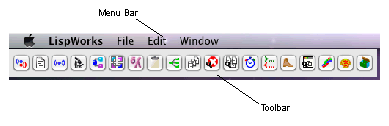
The LispWorks toolbar is automatically displayed whenever you start the LispWorks IDE, and it appears whenever LispWorks is the active application. It disappears when LispWorks is not the active application.
Like many other applications, the menu bar contains File and Window menus. As well as a list of LispWorks windows, the Window menu contains commands that apply to the current window and also contains menus that allow navigation between tools in the LispWorks IDE.
The File menu allows you to open a file in an Editor, or print a file, regardless of which window is active. When the Editor or Listener tool is active, the File menu contains other commands for miscellaneous operations on the file displayed. The Window menu lists all the active LispWorks windows you have running. You can access all the LispWorks IDE tools via the LispWorks toolbar or via the Window > Tools menu.
Note: If you wish to exit the Lisp image during this tutorial or at any other time, choose LispWorks > Quit LispWorks or press Command+Q .